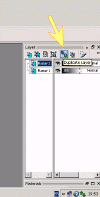
Click on the diagrams to see full size image
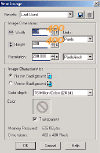
OPEN A NEW IMAGE 250*250 BACKGROUND TRANSPARENT.
OPEN YOUR TUBE AND EDIT >COPY.
CLICK ON YOUR NEW BLANK IMAGE TO REACTIVATE IT AND
EDIT>PASTE AS NEW LAYER.
RESIZE AS NECESSARY. IDEALLY YOU WANT A VERY LARGE BORDER.
DO NOT DUPLICATE IMAGE.
This tag is slightly different.
Add a new raster layer above your tube.
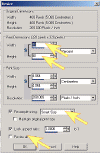
Go to Effects>Distortion Effects> Spiky Halo and use these settings
Horizontal -69
Vertical -5
Ray Settings
Amplitude 73
Frequency 90
Radius 10
Edge Mode Colour - Choose a colour from your image.
Click OK
Duplicate THIS image
Image>Mirror
Select the font of your choice and the colours patterns of your choice to add wording.
I recommend you have your font settings as Create as Vector as this creates a new layer.
![]()
Position your text to the height you require and then use the following command to centre it.
Go to Objects>Align>Horiz.Centre in Canvas
MERGE VISIBLE LAYERS.
Finished!
Gallery
