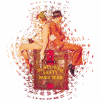
Click on the diagrams to see full size image
The first part of the tutorial is the same for all tags. If this is not the first one you have done, prepare your tube and click here
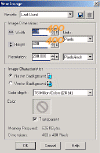
OPEN A NEW IMAGE 4OOX400 BACKGROUND TRANSPARENT.
WE WILL RESIZE THE IMAGE AT THE END, BUT A LARGE WORKSPACE IS EASIER TO WORK WITH.
OPEN YOUR TUBE AND EDIT >COPY.
CLICK ON YOUR NEW BLANK IMAGE TO REACTIVATE IT AND
EDIT>PASTE AS NEW LAYER.
RESIZE AS NECESSARY. IDEALLY YOU WANT A VERY LARGE BORDER.
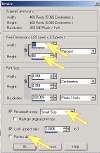
IMAGE>RESIZE
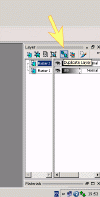
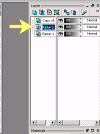
DUPLICATE IMAGE.
MAKE SURE YOUR LOWER RASTER LEVEL IS ACTIVE AS IT IS THE BACK IMAGE WE ARE GOING TO TRANSFORM.
Go to Effects>Dsb Filter > Bubbles and use these settings (See diagram below or
bubbles 48 Density, Frequency and Tune 50)
|
Optional
|
|
You can return to your middle layer and go to Effects>Distortion Effects and Ripple at these settings
|
Select the font of your choice and the colours patterns of your choice to add wording.
I recommend you have your font settings as Create as Vector as this creates a new layer.
![]()
Position your text to the height you require and then use the following command to centre it.
Go to Objects>Align>Horiz.Centre in Canvas
MERGE VISIBLE LAYERS.
Finally resize your image down to 250pixels.
OPTIONAL
Select a colour from your image using the dropper tool

Fill bottom layer with colour (Raster One Layer).
Select Image>Picture Frame and choose any frame.
Finished!
Bubbles Gallery
